© 2013 Plum Group, Inc. All rights reserved.
| 4. Outbound Campaign |
Next |
To view individual responses for each user, first place your mouse on the "Reports" header as shown below and click on Individual Responses.

You will then be led to a page where you can set various options for how you want to view your individual responses. For Survey, you can select which survey's individual responses you want to view, as long as they have data collected for them. For Start Date and End Date, you can enter in a time period to filter how you want to view responses. To enter a date, you can either enter it by hand in a MM/DD/YYYY format...
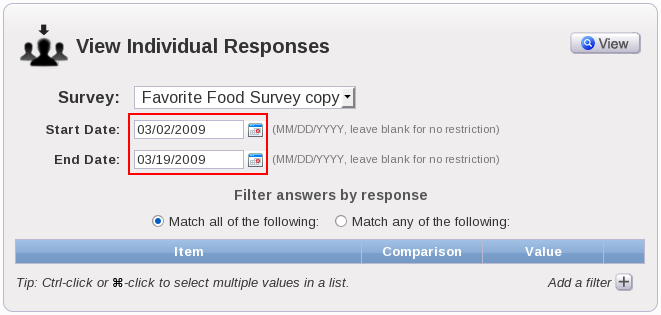
or, you can use the calendar icon tool to select a date.

If you don't want to filter how you view your responses by date, you can leave Start Date and End Date blank.
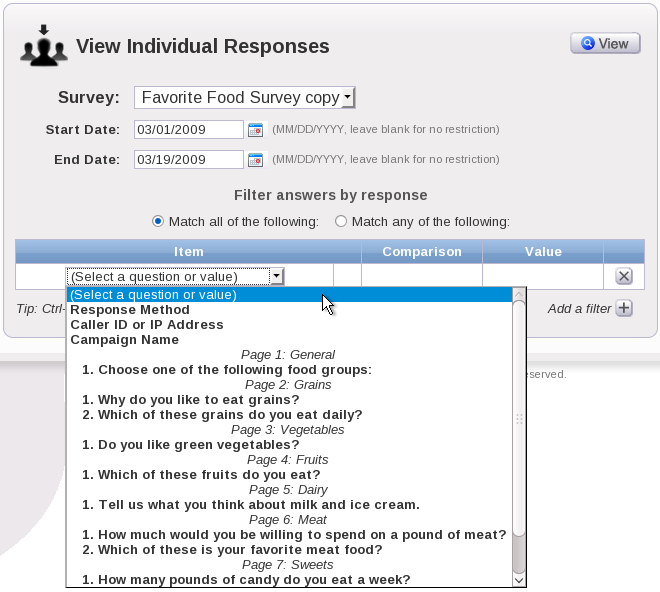
To filter answers by response, click on the "Plus" button next to Add a filter. Here, you can select from the drop-down box under the "Item" header a question or value as a filter to view your individual responses.
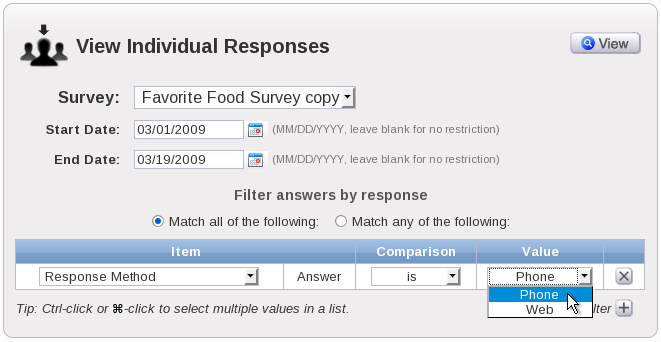
For Response Method, you can filter your responses by whether the user answered your survey by web or by phone. To filter your responses by phone, select Phone from the drop-down box under the "Value" header. To filter your responses by web, select Web from the drop-down box under the "Value" header.
For Caller ID or IP Address, you can filter your individual responses using the drop-down box under the "Comparison" header. The choices you can select are: is, is not, contains, and doesn't contain.
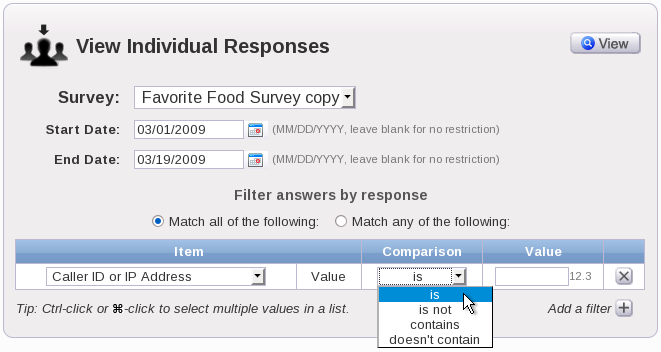
Once you decide on how you want to compare your individual responses to the filter, you can enter a value in the textbox under the "Value" header to complete your filter.
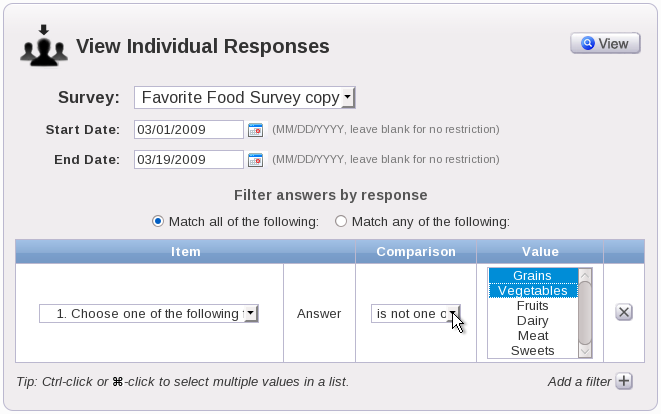
You can also filter your responses by the questions in your survey. To do this, select one of the questions in your survey from the drop-down box under the "Item" header.
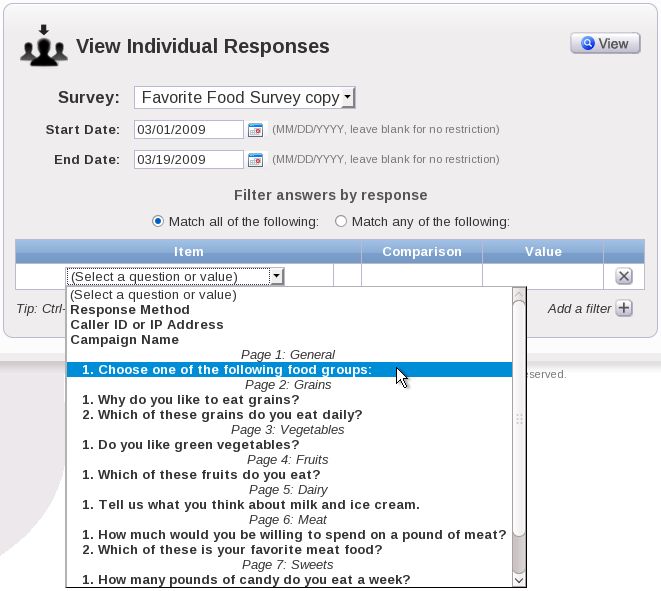
From here, you can select how you want to filter your responses for this question by selecting a choice from the drop-down box under the "Comparison" header and by entering a value under the "Value" header.
Once you have added all of your desired filters, click the View button. You should then be redirected to a page where you can view your responses, depending on how you set up your filters.
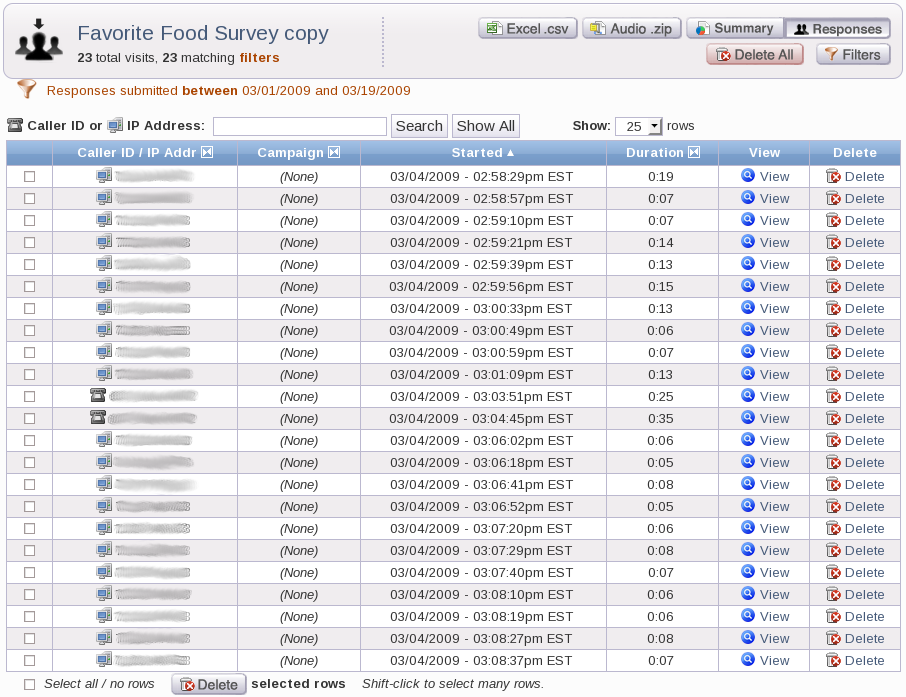
On the Individual Responses page, you can use the Caller ID or IP Address textbox to search for a specific caller ID or IP address response. Simply type in the caller ID or IP address in the textbox and then click the Search button to search for it. One example of how you can use this search feature is if you were only looking for responses from a specific area code such as Boston, you would type in "617" to view only responses from this area code. If you wanted to view all your responses again, you can click the Show All button.
You can also adjust how many responses you want to view at once on your page. You can change the default of how many rows of responses you want to view by selecting an option from the drop-down box for Show:. You can select whether you want to view 25 rows at once, 50 rows at once, 100 rows at once, or 300 rows at once.

To view an individual response, click on View. A window should appear where you can view the answers that were given for the response. Notice that you can also view the source of the response, when it was started, and how long it took the user to complete the survey.
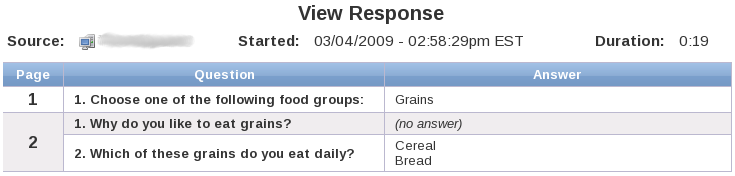
NOTE: For transfer type questions, the answer given for the response is the number of minutes that the transfer lasted. For comments type questions, if you have enabled transcriptions, you will see a transcription for a recording from a phone respondent. Please note that it may take up to 5 minutes to see a transcription after a recording has been made. These are not meant to show up in real time.
To delete an individual response, click on Delete. Clicking this will lead you to another page confirming if you want to delete the response. To cancel this action and return to the Individual Responses page, click on Cancel. If you want to proceed with deleting the response, click on Delete.

Once you click Delete, you will be led back to the Individual Responses page where you will see the message, "Response successfully deleted."
If you want to delete all the responses on the page you are viewing, you can click the checkbox for "Select all/no rows" to select all of the rows and then click the Delete button.
If you want to delete all of your responses altogether, you can click the Delete All button.
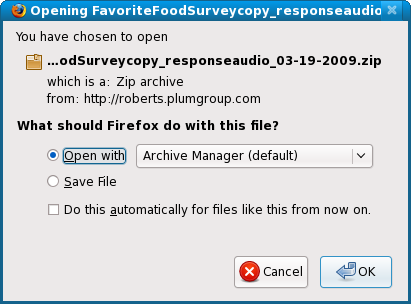
To download audio responses to your computer, you can click the Audio.zip button at the top of the page.

Once you click this button, you can download a zip file containing all the audio responses for your survey.
If you open up the zip file, notice that the naming of your audio files corresponds to the <file:###-###.wav> tokens in the CSV response data. This will allow you to uniquely identify your downloaded audio responses with a respondent. You can rename these audio files to however you like once you have downloaded them, but make sure you do the same for your CSV file so that you keep track of the audio response files for each respondent.


| 4. Outbound Campaign |
Next |